Pricing
Price lists are a way of managing the price suppliers charge retailers. For each variant, you set a base price (price charged to retailers) and a suggested retail price.
The first step is Suppliers determine what products and variants should be included. This means pricing is owned and initialized by suppliers. Once it's assigned to the partnership, it will be visible by the retailer and they can make suggestions to it in app.
If a Supplier’s products are not on the price list but active it's visible to the retailer. However, it can only be selected by the retailer once priced. If a price is removed and it's already listed on the retailer store, it should be removed.
How to Create a Price list and Assign to Partnership
Start by navigating to the pricing page. On the right side, you will see a "Add Price list" form. This will take you through a series of steps to determine how you want the price list to function.
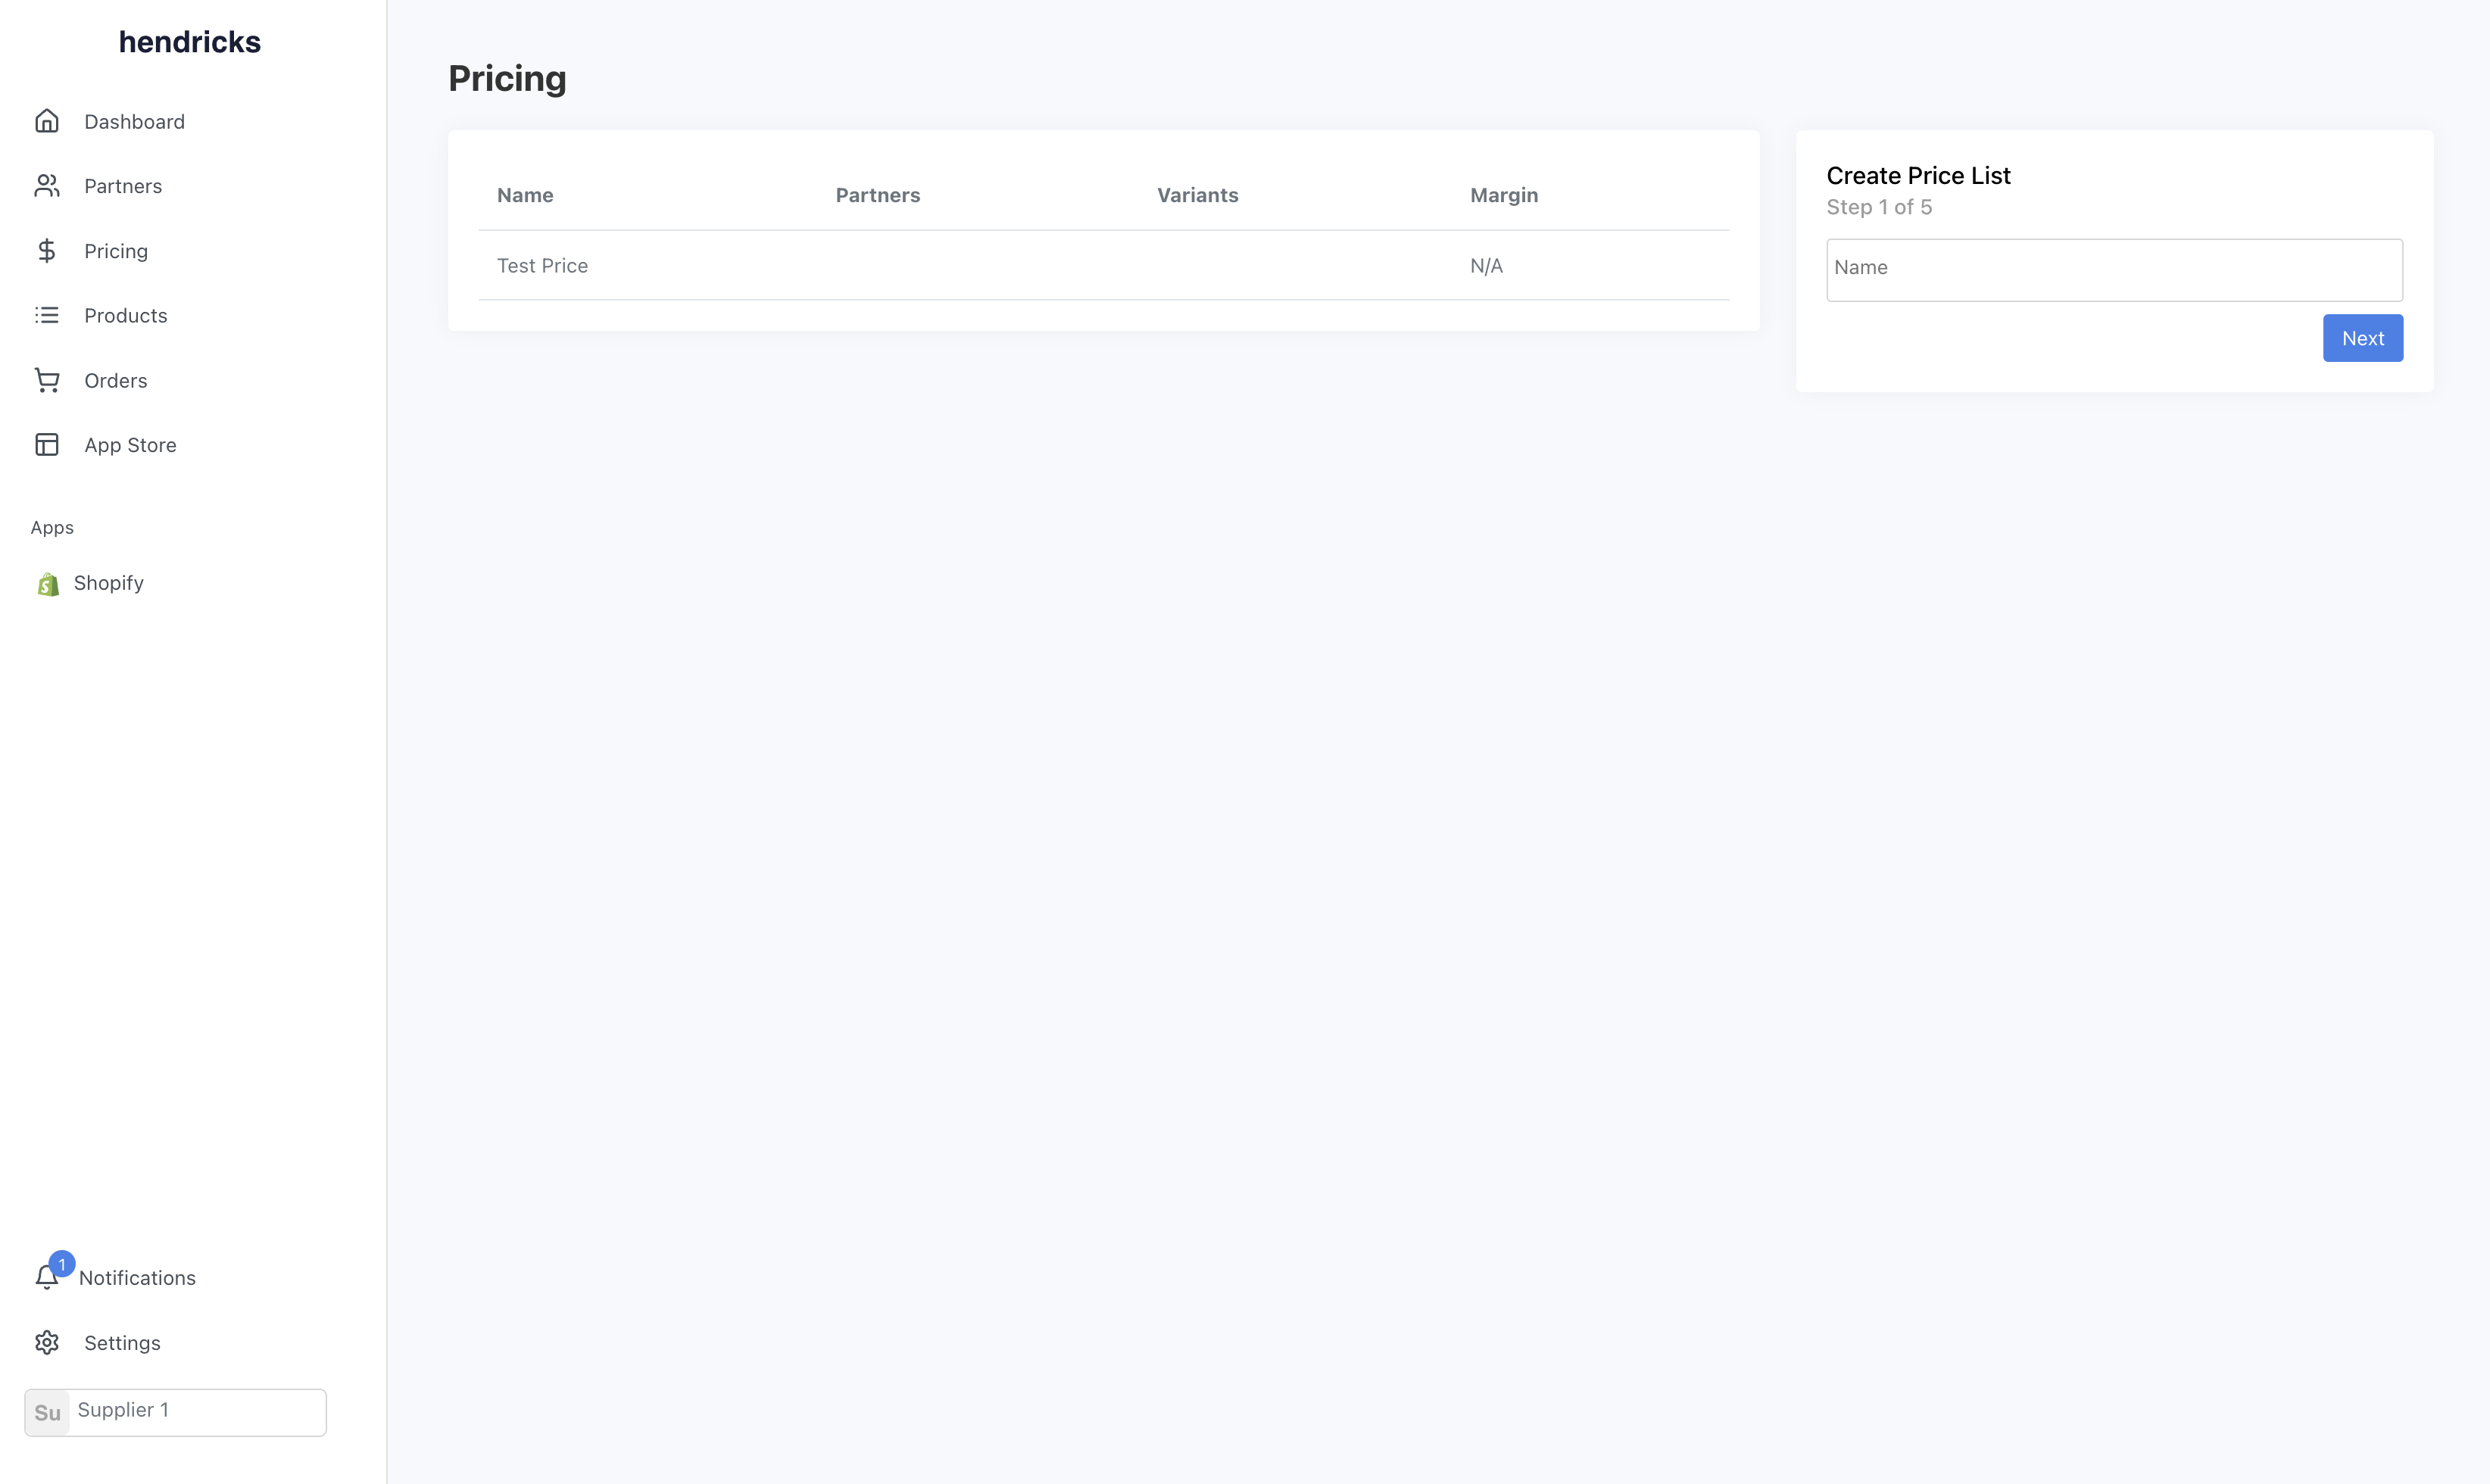
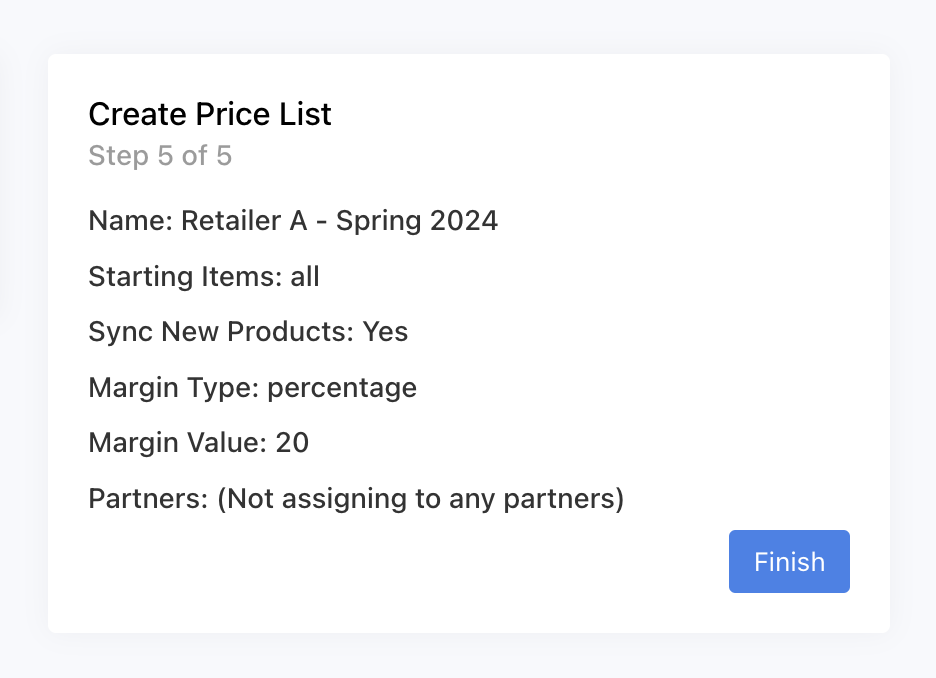
It starts with a name. Most supplier create one price list per partnership, however, they can be shared. As well, many suppliers may associate any elements of seasonality or time. Ex. "Retailer A - Spring 2024".
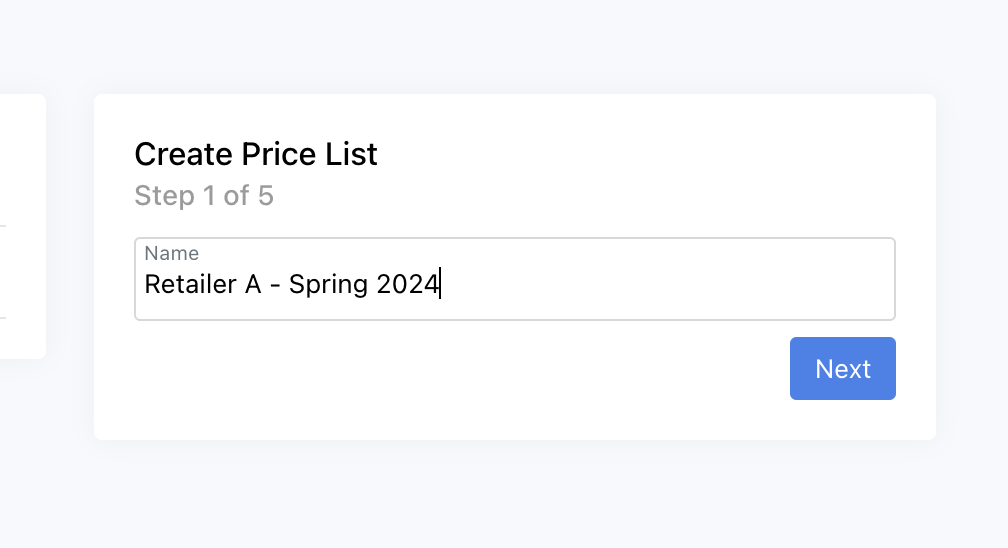
Next, you will determine what the starting state of the price list will be. Either it can be all your current variants, or empty. If you choose empty, you will need to add variants to the price list. We also have the ability to upload CSV files for faster management. If you select all, you will need to set a default margin for all variants. This can be a fixed amount or percentage. In both cases, it uses the retail price on the variant. If you are syncing from a platform, it's the value set on the product.
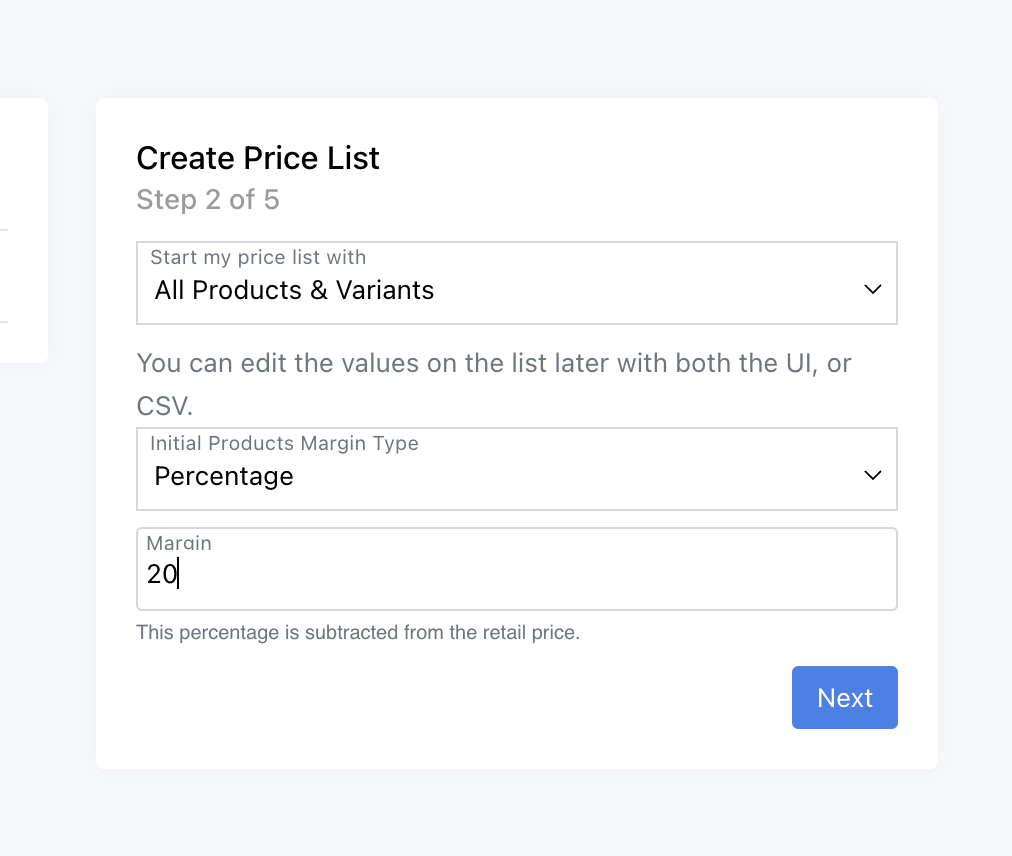
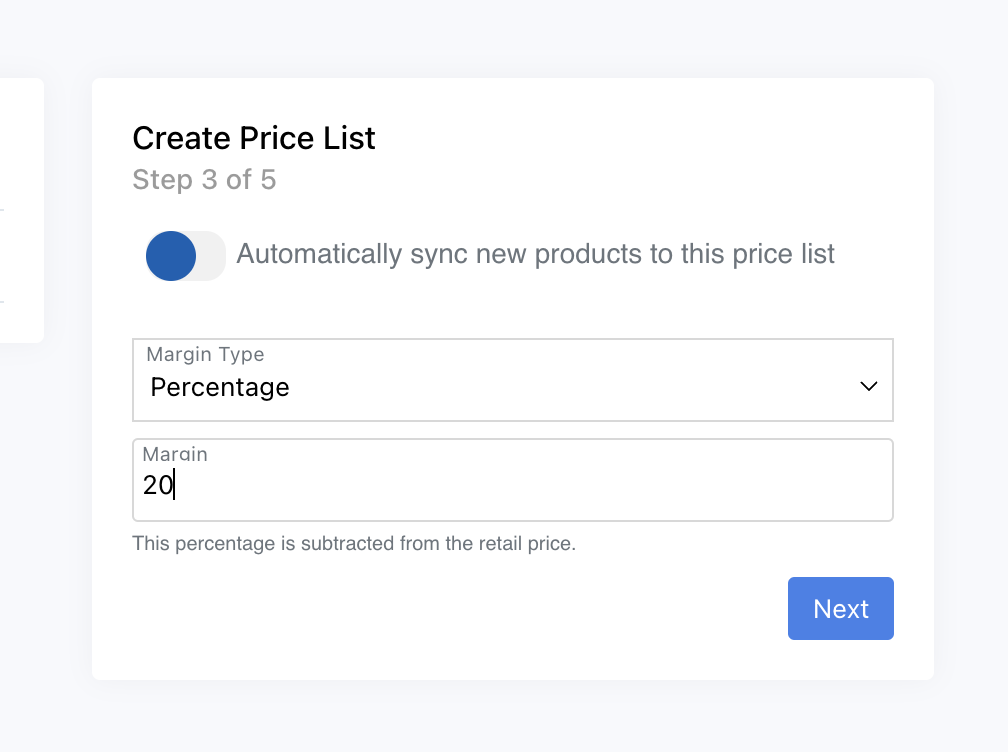
You will be prompted on how to handle new products. As you add new products to your account (most likely automatically syncing from a platform like Shopify), you can choose to automatically add them to the price list. This can be used if you want your entire catalog to always be offered to the retailer. If enabled, you will need to provide a default margin type and value. Similar to above, it's taken from the retail price.
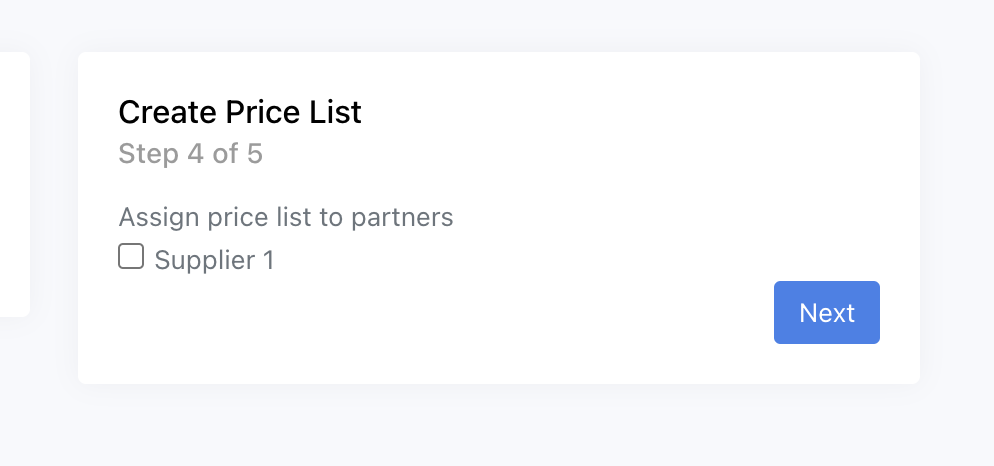
You will have the opportunity to assign the price list to a partnership. If you have no partners, this step will be skipped.
Finally, before creating the price list you can review all the information. Hit "Create" and it will be created. This price list now can be assigned to additional partners on the specific partner pages.
If you selected start with all variants, they will add in the background but may take some time depending on your catalog size.
How to Manage Entries
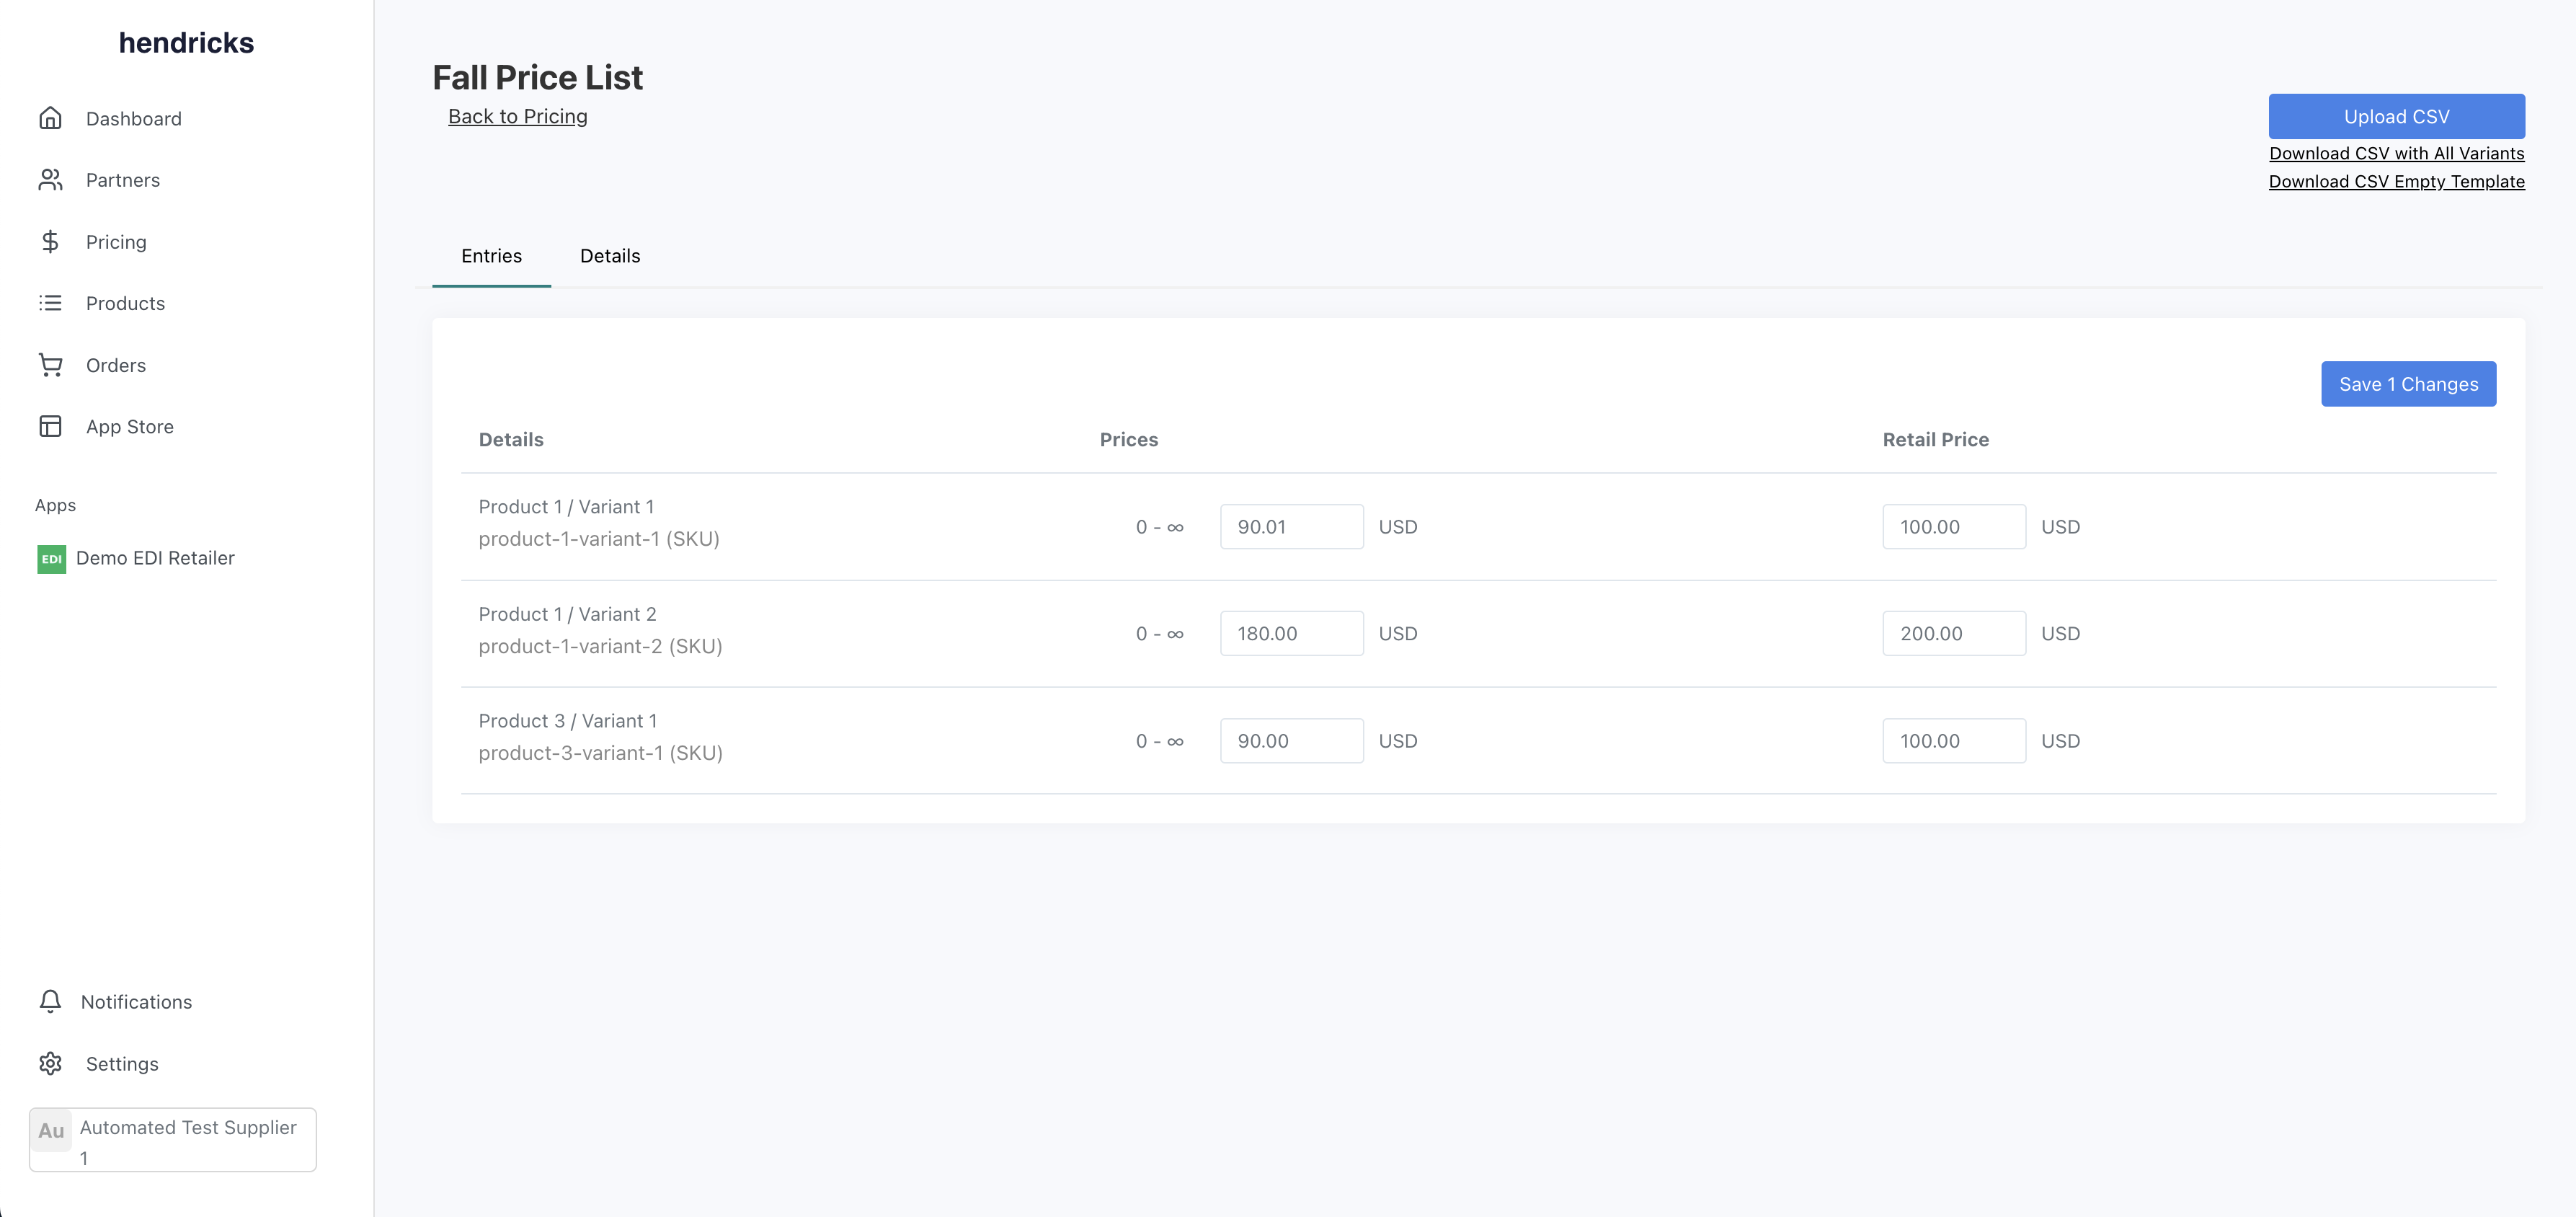
You can view the price list entries by clicking on the price list from the pricing page.

This will load the details and entries for that price list. You can either search for a specific entry using the title, SKU, or barcode. You can also edit the base price (amount invoiced to the retailer) and the suggested retail price. For large catalogs, view CSV management below.
CSV Management
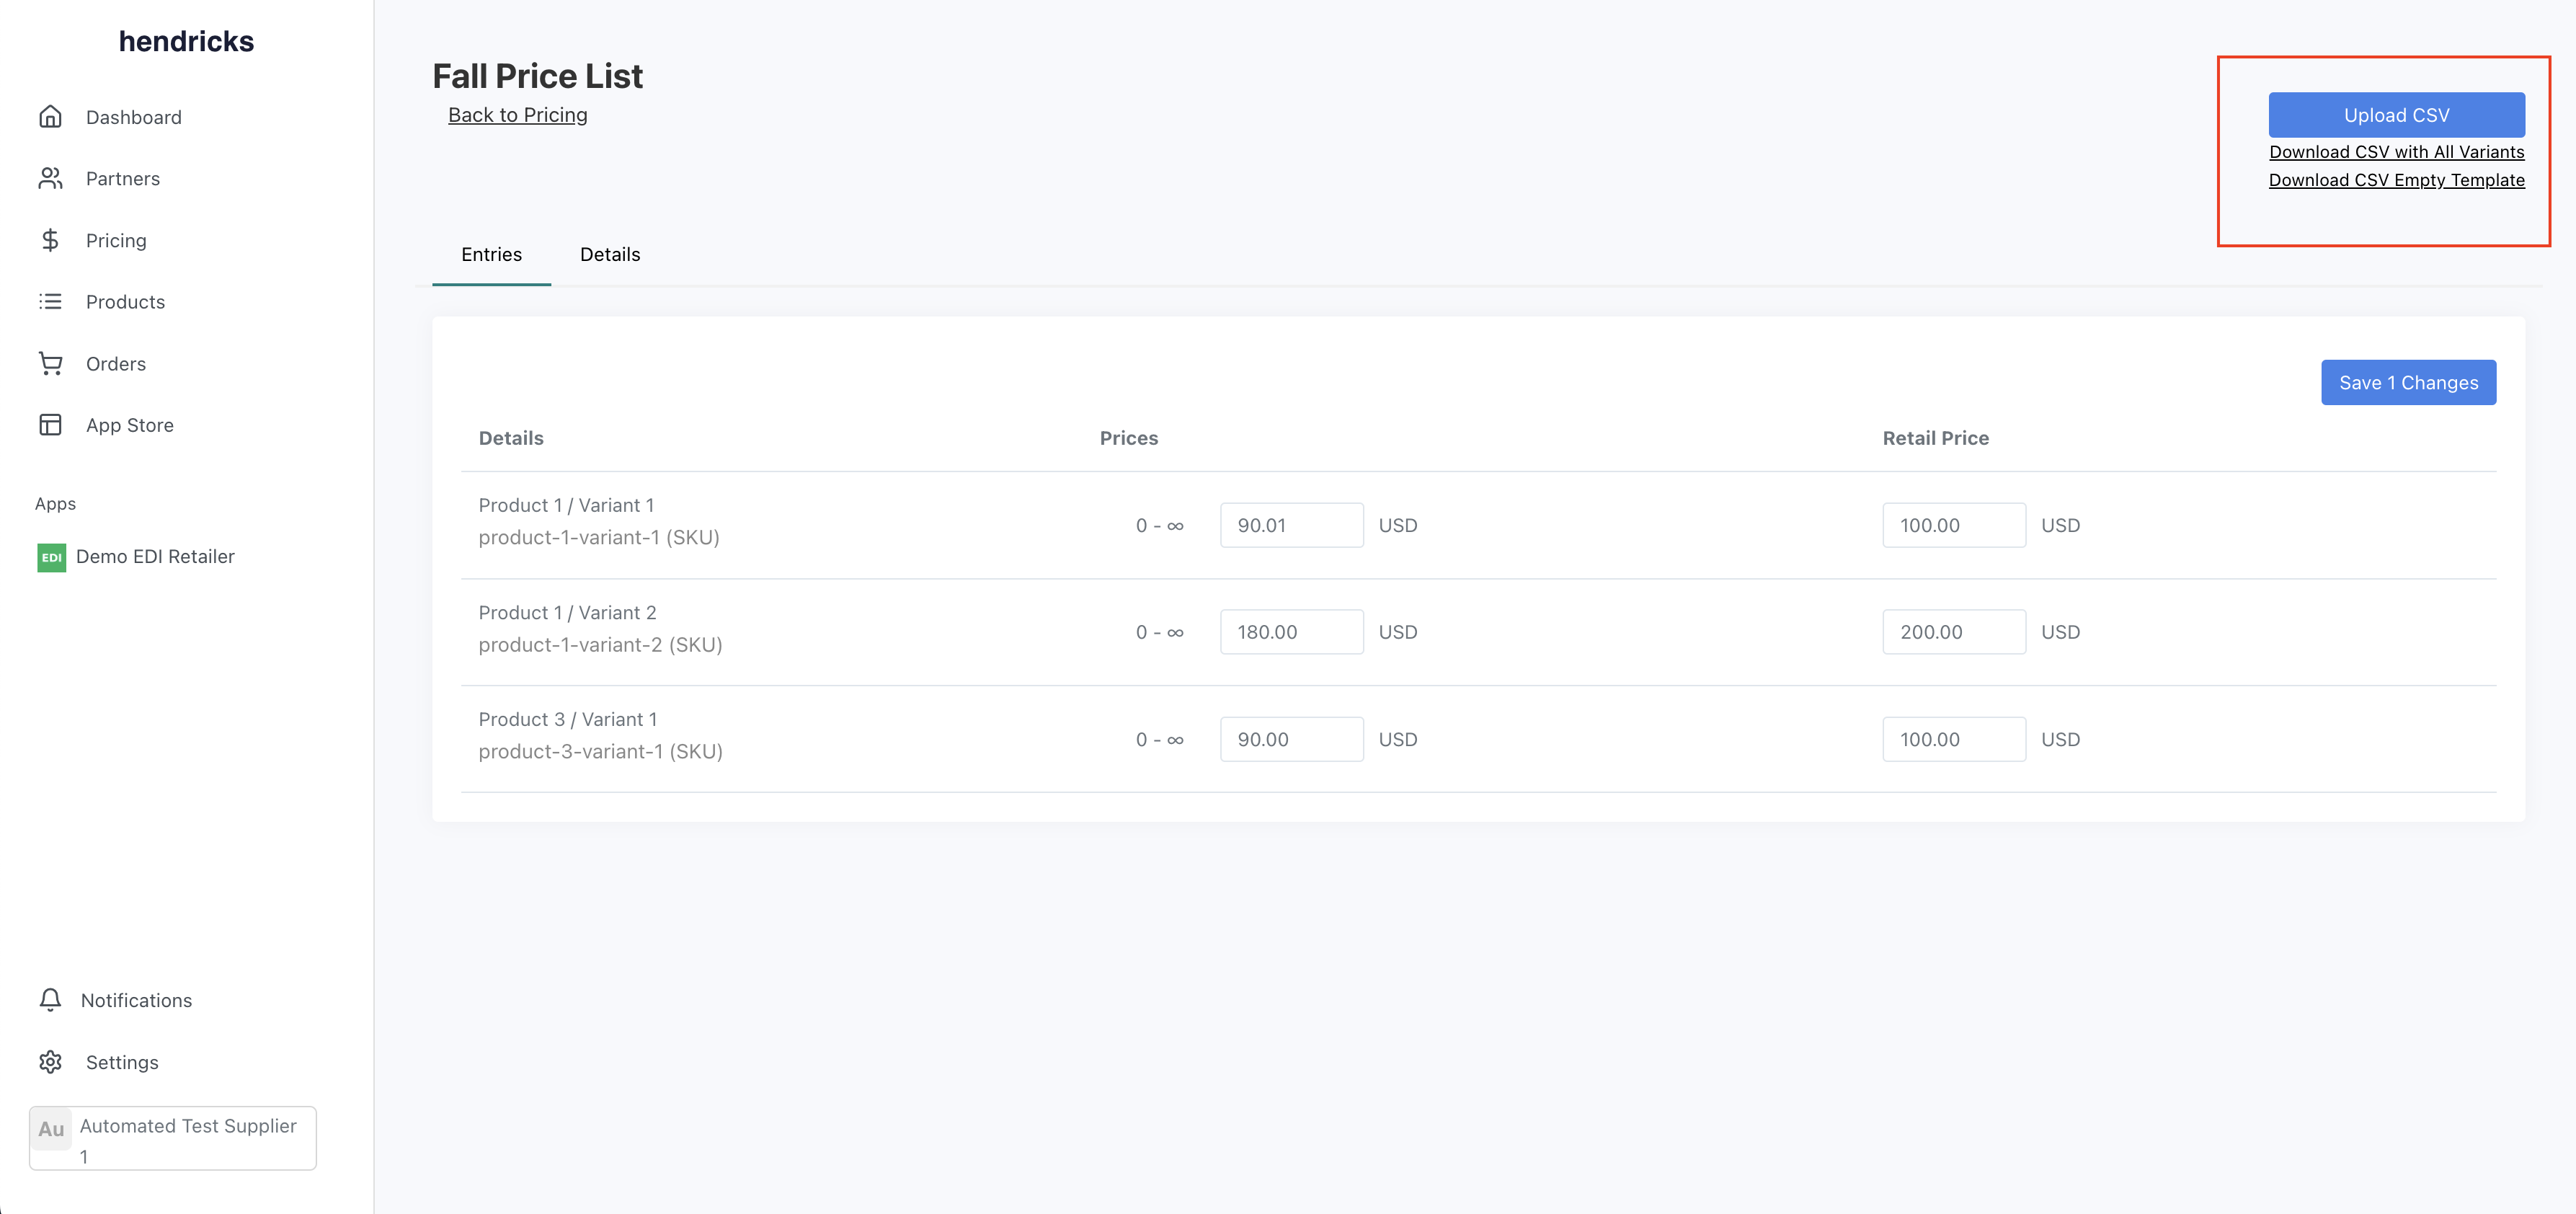
We have the ability to upload CSV files to manage price list entries. We allow you edit an entire collection, or just the subset you want. In the top right corner, you can download the initial CSV file. It will be an empty file, contain all the current entries, or all variants. In all cases, it will provide a template for you to follow.
Below is a sample of the CSV file.
1 2Action (Upsert,Delete),Product ID (Read only),Variant ID (Read only),Product Title, Variant Title,SKU,Min Quantity,Base Price,Base Price Currency,Retail Price,Retail Price Currency Skip,prod_aba73050e3da4691b09ca3e1cdb39a8d,var_ccac2a01454c49d2a94a4c4d3a0dbfc7,Product 1,Variant 1,product-1-variant-1,0,90.00,USD,100.00,USD
The first column is an action you want to be taked. It can be upsert or delete. upsert will adjust the entry to match whatever you have in the other columns. delete will remove the entry. If you do not want to modify an entry, just exclude it from the CSV file.
If you want to delete all entries, using a tool like Excel or Google Sheets, it will be easier to edit the first column in bulk. Then reupload the file.
Once you are happy with the changes you are making, upload the file. It will take a few moments to process. If there are any errors, we will return only the rows with errors. The error will be appended to the end of the CSV. We do this so you know exactly which row failed, and why. You can make the required changes, remove the error column and reupload the (error) CSV file.